
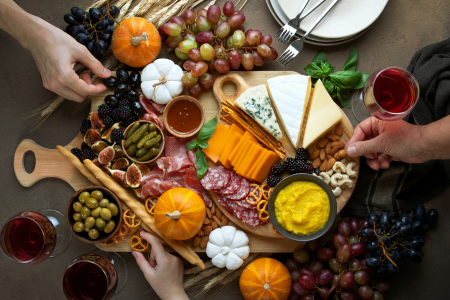
A well-built cheese board has a way of making any gathering feel a little more special, without demanding much in the way of actual cooking. It’s one of the easiest entertaining tricks to have in your back pocket: minimal prep, maximum visual payoff, and enough flexibility to work for a casual weeknight get-together or a more polished dinner party. Here’s how to build one that looks effortless because, with the right approach, it genuinely is.
Start With a Simple Cheese Formula
You don’t need a dozen varieties to make an impressive board. A good rule of thumb is choosing three to five cheeses that offer variety in texture and flavor:
- A soft cheese (brie, camembert, or a fresh goat cheese)
- A hard, aged cheese (aged cheddar, gouda, or parmesan)
- A blue cheese for those who enjoy something bolder
- A semi-soft, crowd-pleasing option (havarti, fontina, or a mild gouda)
This mix ensures there’s something for a range of tastes without overwhelming the board with too many similar options.
Think About Temperature
Cheese tastes best served at room temperature, since cold temperatures mute flavor and texture. Take cheeses out of the refrigerator roughly 30 to 45 minutes before serving, giving them time to soften slightly and develop their full flavor.
Build in Textural Contrast
The best boards balance soft and crunchy elements throughout, not just in the cheese selection itself. Crackers and bread are the obvious base, but consider varying the shapes and textures: a mix of plain crackers, seeded crackers, and thin baguette slices offers more visual and textural interest than a single type spread across the whole board.
Add Something Sweet
A touch of sweetness balances the richness of cheese beautifully. Options include:
- Honey drizzled directly over a soft cheese
- Fig or apricot jam served in a small bowl
- Fresh fruit like grapes, sliced pears, or apple wedges
- Dried fruit such as apricots, figs, or dates for a chewier texture
This sweet element is often what elevates a board from “cheese and crackers” to something that feels intentionally curated.
Include Something Salty and Something Crunchy
Beyond the cheese itself, a few salty and crunchy additions round out the flavor profile:
- Cured meats like prosciutto, salami, or soppressata, if you want to lean toward a charcuterie-style board
- Olives, either plain or marinated
- Mixed nuts, particularly marcona almonds, candied pecans, or roasted walnuts
- Pickled vegetables for a tangy contrast
Arrange With Intention
Presentation is where a cheese board really earns its reputation for looking impressive. A few simple techniques make a real difference:
- Place the cheeses first, spaced out across the board, before filling in the gaps with everything else.
- Group similar items together (all the nuts in one area, all the fruit in another) rather than scattering randomly.
- Use small bowls for anything liquid or loose, like honey, jam, or olives, to keep the board tidy.
- Fill any remaining gaps with fresh herbs like rosemary sprigs, which add color and a nice aromatic touch without much effort.
Don’t Forget the Labels
If you’re serving guests who may not recognize every cheese by sight, small labels or a simple handwritten card naming each variety adds a thoughtful touch and helps guests navigate the board with confidence, especially useful if any options are notably strong or unusual.
Pairing With Drinks
A cheese board pairs naturally with wine, but it doesn’t have to. Sparkling water with citrus, a light beer, or even a simple herbal tea can complement the flavors just as well, depending on your gathering and guests’ preferences.
A Little Effort, a Lot of Impact
The beauty of a cheese board is that it scales easily, a small version works for a casual weeknight visit from a neighbor, while a larger, more elaborate spread suits a bigger celebration.
Once you’ve got the basic formula down, building a beautiful cheese board becomes second nature, no special occasion required.


