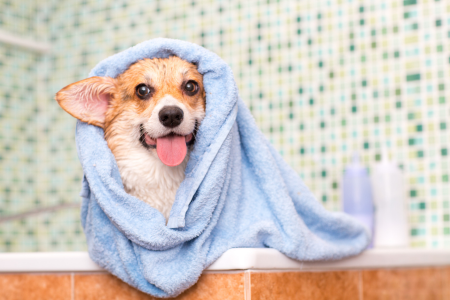
Do you have a furry friend by your side? Awesome! They bring so much love and joy, but let us be honest – muddy paws, tangled fur, and that doggy odor can be a bit much.
Do not worry, you do not have to break the bank or stress out your pup with fancy groomers. Here is the new, secret weapon for pet parents: DIY pet grooming stations! Think of it as a personal spa for your pooch, with all the love and none of the scary strangers. Plus, you can save some cash and turn grooming time into some serious bonding fun.
The Magic of DIY Pet Grooming Stations
1. Convenience is Key: Picture this – a dedicated space in your home where you can pamper your pet to your heart’s content without ever leaving the comfort of your abode—no more frantic trips to the groomer or waiting anxiously for your turn in line. With a DIY pet grooming station, you are the boss of bath time!
2. Save Those Pennies: Let us face it, professional grooming services do not come cheap. Investing in your DIY grooming setup saves money in the long run and helps you gain valuable skills that will last a lifetime. Think of all the extra treats you can buy with the cash you will save!
3. Bonding Bonanza: Grooming is not just about hygiene – it is also a fantastic bonding experience for you and your furry friend. As you lather, rinse, and repeat, you will forge a deeper connection with your pet and create memories that will warm your heart for years.
Crafting Your Perfect Pet Grooming Oasis
Creating your DIY pet grooming station is easier than teaching an old dog new tricks! Here is what you need to get started:
1. Find Your Zen Zone
Choose a spot in your home that is easily accessible and has good drainage. A laundry room, garage, or even a spacious bathroom can make for paw-some pet grooming stations.
2. Gather Your Arsenal
No grooming station is complete without the right tools for the job. Stock up on essentials like a sturdy bathing tub or basin, pet-friendly shampoo, brushes, combs, nail clippers, towels, and treats (for you and your pet!).
3. Set the Stage
Install hooks or shelves to keep your grooming supplies organized and within arm’s reach. Consider adding a non-slip mat to keep your pet steady during bath time and prevent slippery mishaps.
4. Safety First, Fur Always
Always prioritize safety during grooming sessions. Use pet-friendly products, secure your pet during the bath, and be gentle and patient. A calm and relaxed atmosphere is vital to a successful grooming session.
Tail-Wagging Tips for Success
1. Start Slow: If your pet is not used to grooming sessions, gradually introduce them to the process. Offer treats and praise to make the experience positive and rewarding.
2. Make it Fun: Turn grooming into a game by incorporating toys, treats, and plenty of praise. Keep the mood light and upbeat to ensure both you and your pet enjoy the experience.
3. Practice Patience: Rome was not built in a day, nor is a perfectly groomed pet. Be patient with yourself and your furry friend as you navigate the grooming process together. With time and practice, you will both become grooming pros.
A DIY pet grooming station is more than just a practical addition to your home – it is a labor of love for your four-legged family member. By taking grooming into your own hands, you are saving time and money and strengthening the bond between you and your pet. So, roll up your sleeves, grab your grooming gear, and get ready to unleash the beauty within your beloved pet – one bath at a time!