Autumn is in full swing and there are so many incredible changes happening. The kids are back to school, football is on TV, the leaves are changing color and you get to enjoy the crisp, cool air of the season. With everyone’s schedule jam-packed, the weekends become more meaningful when the entire family can get together. With the great weather outside, you don’t want to get caught sitting on the couch. Why not spend a night with the family sitting by the fire? Don’t have a fire pit? Good thing they’re cheap and easy to build! Here’s how you can build one by yourself:
Get your supplies together
Building your fire pit doesn’t require too much equipment. All you’ll need is:
- Bricks
- Gravel or firebrick
- Stake and twine
- Tape measure
- Large shovel
- Tamp
- Level
- Spray paint
- Fire-resistant mortar for extra stability
You can buy any of these items at your local hardware or home improvement store. Make sure you purchase a heavy, sturdy type of brick to give your pit some extra support. You can get concrete retaining wall block or pavers at most Home Depot or Lowes stores.
Step One: Mark the Area Where Your Fire Pit Will Be
It’s very important to be considerate of your fire pit’s location. The pit should not be right next to your home and should not be placed under or near any landscaping that may have branches or hanging components. Once you have found a safe place in your yard, secure the stake in the ground with a long piece of twine tied to it. Use the twine as a guide to paint a circle around the stake; this circle will be the circumference of your fire pit. You can make the pit as large or small as you want! Don’t forget, you will want to check with your HOA or study your local city code to make sure the project is approvable. You don’t want to start digging to find out you’ve cut an electrical line!
Step Two: Shovel and Tamp
After removing the stake from the ground, shovel the area inside the painted circle. Once you have a clear sight of the dirt beneath, use your tamp to stomp down the dirt. Periodically check to see if the ground is even with a level. Tamp the ground until it is level throughout the circle.
Step Three: Add Base
Once the ground is leveled out, select what kind of base you want to use. Gravel would be the simplest to lay out; all you would need to do is dump it out of the bag and even it out. However, firebrick is more heat resistant and may last longer. One downside to firebrick is it may need to be cut to fit the dimensions of your fire pit. But, if you do use firebrick as a base, consider pouring a bag of sand over top and sweeping it to fill in any cracks or gaps. If you decide to use gravel, make sure there are a couple inches of the base to protect the ground below. Regardless of what base you use, make sure it is spread evenly within the circle in the ground.
Step Four: Build the Wall of the Pit
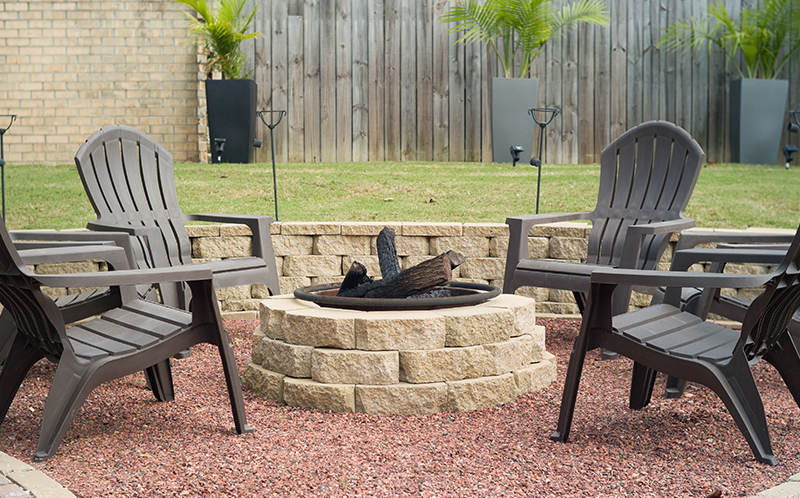
Now that you have a base for your fire pit, begin to lay your bricks in layers with each layer staggering on top of the one below it. You want the walls to be at least a foot tall, if not more. If the bricks are heavy enough, you will have a sturdy foundation for the fire pit. For extra stability, use a fire-resistant mortar between the bricks. For added safety, include a metal ring on the inside once the mortar is set. If you add a metal ring fill the inside with a layer of lava rock.
Step Five: Enjoy
Once the walls are up and the adhesive is dried, toss in some wood and cozy up to the fire. Bring out some chairs, jam to some music and roast some marshmallows with the family for a great autumn evening!